


Transfer photos to PC using Windows Explorer
First things first, connect your iPhone or other Apple device to your computer using the correct USB Cables.
Image courtesy of: Mobile Fun

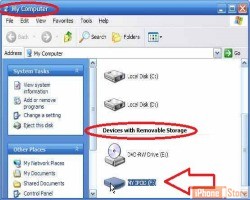
Now, from your desktop, click the Start button and then the My Computer button.
Image courtesy of: Oracle

The previous step should have opened a window that lists your devices with removable storage. If your device is connected well you will see the icon for your device listed under removable storage. Double click your device icon to open up the directory that is full of your folders and subfolders.
Now from your directory you will click on the Internal Storage option.
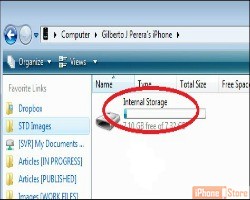
See Below


All finished, now that you imported your photos to your desktop using Windows Explorer you can take all the time you need to edit and share them.

Transfer iPhone Pictures to PC Windows 7
Two Ways to Transfer Images from iPhone to a Computer
How To transfer photos from iPhone to PC